Read Modbus values and make them visible - failed

Hello,

i am new in openhab v2.
I try to connect my house heating system via modbus tcp to openhab v2.
In the first step i create a “Thing” - “Modbus TCP Slave” with the correct local IPv4-address and the tcp port of the heating system.
In the next step i create a “Regular Poll” thing with the created modbus tcp slave bridge selected.
I try to read out register 8198 with an length of 1. The type is holding register (i try them with modbus test freeware for windows). The value is in unit °C. readed out value is ratio 10, so when 677 is readed, the real temperature is 67,7 °C.

But now i have the problem to make the readed out value visible.
I think the next step is to link an item to the regular pool thing, but how? I use the simple mode too, but the item is not created automatically.
Anyone can help me?

Welcome to the openHAB forum :wave::wave:

Since you have the Simple Mode ON, the item should have been created and linked. Look at the Ting page before the one you posted ( just hit the blue check mark to go there). It should show the Thing with its channels, expand the channel and the lines item will be shown.
Additionally the Control section of PaperUI will show all Channels of Things that are linked to an item.

All that is assuming that your Thing does have channels, I’m not fluent in Modbus!

The thing has no channel, that is my problem.

Looking into the Documentation reveals that only the data thing has channels.

Now i set the poller to start “8195”, because this is the first register from my sheet.

Length i set to 30 for testing.

But i don`t understand for example i want to read out “8198” now. I create a new modbus data thing and what i type in “read address”? 8198 or 3?
What is the read value type?

In Control there shows me everytime an result of 2, but the value is 677.

I’ll warn you up front, that while “simple mode” is helpful for your first time through creating things, channels, and Items, it may become a nuisance later when you try to exert more control yourself.

You have read the docs for this binding? It is complex, with lots of manual configuring, because that’s Modbus.
Go slow and careful.
For a data Thing read address, you put what you want e.g. 8198.

That is something your target device determines. It is not possible to guess what your heating system manufacturer chose as format. What did you use in the test software you used?
As a guess, I’d try int16 for a single register.

Depends what read value type you used, you kept that secret.

But if you get data you don’t expect, see the notes in the binding docs about addressing.
There are two ways to identify a Modbus register - an address, which start at zero, and a number, which start at 1
register address 0 = register number 1
register address 8197 = register number 8198
The modbus binding uses addresses always. You’d have to look at your heating system docs to find out which they use.

2 Likes

thanks for ur help.

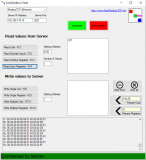
I use “EasyModBus Client” to test it.

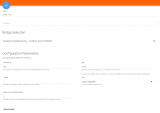
Here is data-poll setting:

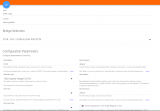
data-thing setting:

and here is the register sheet from my heating system.

at last - the output at the control desk:

1 Like

Your sheet says that 8198 is system_sensor_status, where 2 = OK

Your sheet says that temperature sensing is in 8197

It seems to me you ought to look where the sheet says.

“But my test software found it at 8198 !!”
See earlier notes about register address / number being out-by-one.
Which does the test software use?

1 Like

You dont seem to understand the sheet you´re using.
As Rossko says, according to the sheet, the register 8198 is the status output.
You receive value “2”, which according to your sheet is equal to “Ok”. (You havnt translated “2” to “Ok” anywhere).

The reading is working just fine.

What I dont get is why your have linked a Switch and a String as well?

1 Like

This is down to the way the Modbus binding works. In Modbus, you just get a register. The binding data Thing allows you to link that register, or a little group of registers, to an openHAB Item in many different types - Dimmer, Switch, Number, etc. A channel is automatically provided by the binding for each possible choice, the user chooses to link them or not (and in most cases links only one)

This is where “simple mode”, auto creating Items and auto linking stuff, becomes unhelpful.

1 Like

Ahh I see. Never seen it before, cause I use manual things files :smiley:

Oh, big thanks to you and @Kim_Andersen.

I tried 8197 before, but there was a also an 2 as the output. Maybe i need to restart the modbus poll after edit them?

So now i delete all and create it with 8197, and now i get the right output “700”.

Anyone can help me to translate the 700 in 70.0°C? The same for 2 -> OK?

For the “2” to translate to “OK”, you´ll need to do som map transforming. (It easier than it sounds).

This is a example of a map transformation… The file will have to go into the transformation folder, and it files suffix will be .map.

This file is called:
nilan_control_servicemode.map

NULL=0
0=Off
1=Defrost
2=Flaps
3=Inlet
4=Exhaust
5=Compressor
6=Heating
7=Hot water
8=Central heat

The idea is pretty straigt forward.
0 translate to off
1 translate to Defrost
2 …
3 …
etc

In your item youl have to tell it to use the map inside the label, which looks like this:

Number Nilan_Control_ServiceMode     "Service mode select [MAP(nilan_control_servicemode.map):%s]"    	<lock>          (gNilan) 	{channel="modbus:data:myNilan:controlRegisters:hol1005:number"}

And you´ll have to install the Map Transformation in PaperUIAddonsTransformations

As for dividing 700 to 70.0 degree, you´ll need to add a javascript file to you Data thing:
Looks like this:

  Bridge poller inputRegisters [ start=200, length=23, refresh=6000, type="input" ] {
      Thing data inp200 [ readStart="200", readValueType="int16", readTransform="JS(divide100.js)" ]

Notice the part , readTransform=“JS(divide100.js)”
The script looks like this, and should in this case be named dividie100.js and placed inside the tranformation folder as well:

// Wrap everything in a function
(function(i) {
    return parseFloat(i) / 100;
})(input)
// input variable contains data passed by openhab

And you´ll have to install the Javascript Transformation in PaperUIAddonsTransformations

Small notice…
Since I use manual created files, I have no idea how to do this in PaperUI. Someone else will have to guide you on that part.

1 Like

For safety, yes. The binding can be restarted , or the whole system, to be sure that Things edited in file are picked up.
Latest binding version should be better at this kind of thing.

1 Like

Thank you.

I installed the openhab at synology diskstation, where i find the files you tell me?

In both locations from documentation:

  • with public share folder: /volume1/public/openHAB2/conf/
  • without public share folder: /volume1/@appstore/openHAB2/conf/
    are empty item and things folders

I have no idea… I use an Rpi.

Normally you´ll find the folders in /etc/openhab2/ I would have thought its exact same using a Synology NAS. Like:

/etc/openhab2/item/ the folder of the items files.
/etc/openhab2/things/ the folder of the things files
/etc/openhab2/transform/ the folder for transformations files
etc…

1 Like