Hello all,
As a fresh newbie, I had an extremely rough time trying to figure out OpenHab.
As I couldn’t find a one-size-fits-all guide for newbs, I thought I might as well write something to help ease that path for complete rookies like myself.
I have very little programming experience (just scripting here and there), am a long-time user of ubuntu and have never played with smart home systems before now.
I jumped in head first with a Tesla solar system, ev charger, EcoWitt weather station and Shelly smart plugs.
Instead of describing my experience, what I will do is to provide an overview of what I’ve learned, and hopefully, put the facets of OH4 into perspective for anyone new. This isn’t a tutorial, per se, just a helpful guide to get someone started quick(er).
Before starting, it is highly recommendable to make sure you read through this helpful post on the Semantics of OpenHab. It is well worth the read.
HARDWARE:
I installed OpenHab 4 from scratch on a freshly installed ubuntu 23.04 micro ($120 cheapo on Amazon with 6GB RAM and a Celeron CPU, with 256GB SSD). I didn’t go the OpenHabian way because I wanted to be able to scale to more things on this little server in the future, if needed.
If you’re new, I recommend going the OpenHabian route: openHABian | openHAB
INSTALL:
The guides are very straightforward. If you follow documentation here, you will have no problem setting up OH4. The trouble begins (at least it did for me) with understanding what the heck to do next!
SETUP:
OK, this is where it becomes vital. OH4 is extremely flexible and very Germanic in its configuration. Instead of the typical HomeAssistant -style of making everything easy and semi-automatic, OpenHab is really more like a framework for you to build a system almost however you like it.
Instead of having a bunch of GUI switches to make everything happen for you while you follow the 80% path created by others, OpenHab is a wide open field with a toolbench for you to make what you want and pretty much go where you want.
To get started, here’s what you’ll need to know:
1. THINGS - To make anything work, you have to create THINGS. While this is explained in the tutorials, I’ll give a brief explanation: a THING is the digital representation of what you plug in somewhere and want to connect to.
2. ITEMS are the configurable/readable parts of your THINGS. ITEMS can be a simple api where you GET data, or, they can be the way that you control your smart light switch. All your interaction will be with ITEMS and not THINGS.
- CHANNELS are the ‘middle-men’ which connect the control/view ITEMS to the real-world THINGS.
Once you have things set up, you don’t often mess with Channels. You can think of them as being like the fiber network which connects the internet. Nobody ever messes with it once it’s installed, but we all use it every day… You’re interested in ITEMS, which are what you interact with directly in OH to control THINGS.
QUICKSTART
OK, so you’ve installed OH4, and are trying to connect to your THING.
There’s the easy way, and the hard way. The hard way, is to try to hack through it by making a new THING and then trying to configure it (without having a clue what you’re doing).
The easy way, is to use BINDINGS. These are the automated means of setting up your THINGS that you’ve been looking for! You should actually start here.
To install bindings, you need to know which bindings you want, (e.g. EcoWitt weather station in my case). Once you kind of know, then you need to go here:
Settings → Add-Ons → Bindings

Now, install your heart out, with all the BINDINGS (automation tools) you need. If you think you might need it, install it.
For most BINDINGS, there may be some settings you need to modify. Click on a binding you installed, and then find that tiny gear icon just off to the right (it’s the size of a ladybug, so look carefully ![]() )
)
See this? This is the icon you didn’t know you needed!

OK, now that you have all the BINDINGS (automagic setup) tools ready, your OH4 system should start recognizing some of your THINGS!
Now, we go back to the main page in OH and celebrate some progress.
Sometimes you will be prompted that you have new things, and sometimes you have to go find them for yourself.
To find them for yourself, use the blue + icon at the bottom right side of the screen.
Then choose the BINDING (automagic tool) and walk through the process to find your THING(s).

Once you have some THINGS you’re ready to do some cool stuff.
Click on a THING and it will open up a new window.
If you didn’t already, then you’ll want to make sure your settings for that THING is all good and dandy here.
If you make changes, be sure to hit the ‘Save’ button in the extreme top right corner of the page. It will often take a few seconds to actually achieve the save ![]()
OK, here is the most vital part. You have a THING, but you need to create ITEMS which are the control levers for your THING.
To do that, click on the ‘Channels’ tab at the top. It almost doesn’t look like a tab, but it is… and it’s vital.

Alright! Now you should see a list of the real-world parameters you really want to interact with, like statuses and controls, etc.
But not yet… not quite yet… you need to make some ITEMS!
(to ‘make’ ITEMS, you will only click ‘Link’ and this ‘Link’ will actually create your ITEMS, you’ll see…)
To do so, you need to click on a single Channel. It will expand.
Now you won’t see exactly the same thing as I’m going to show you, but don’t worry, just follow along.
'You need to click the ‘Add Link to Item’ button as shown here:

This will take you to a vital part in the process, where you are about to connect with the THING.
Select the ‘Create a new Item’ option.
You should see something like this, where there is a lot of information autopopulated:

Notice the Green Arrow at the bottom? You’ll need that later, when you want to set up Grafana and create custom graphs via an external InfluxDB database. Just remember that this green arrow is associated with Grafana and InfluxDB (which comes later). You don’t need to do anything with the ‘Parent Group’ option, other than to note it.
OK, You just click ‘Link’ at the bottom!
Now for the fun stuff.
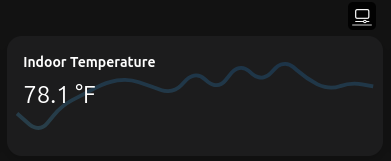
Now, when you go back and if you click on the ‘Channels’ tab and then the channel you just created an ITEM link to, you should see some values that are populated from your THING in there (see my previous screenshot where the Temperature value is clearly visible).
’
If you DO see values from your THING, then you can hit the fast lane by clicking ‘Add Points to Model’ in blue text down below.
Check every box except for the one you already created in the previous step. Skip only that one, but check the rest of the boxes.
Hit ‘Add to Model’ and you now have a ton of ITEMS ready for fun.
Hit ‘Save’ in the top right to make sure you don’t lose what you just did.
Next, click ‘Pages’ on the left menu.
Then select the ‘Overview’ option.
Click on ‘Add Cells’.
You should see a blank box with a + symbol in it, like this:

Just click the + symbol and then select ‘Add from Model’ at the very bottom of the list in Blue.
Now pick your ITEM.
It should populate that cell you just made with some neato meaningful information (fyi, if it says, ‘NULL’, you have a problem).
Congratulations! You just connected to your THING, created an ITEM linked to a THING’s Channel by using BINDINGS! This is the magic sauce of OpenHab.
Play around with this page by adding ITEMS and messing with configurations.
If you have questions, use the OH Community… it’s really good and most likely your problem has already been encountered and solved.
THE CONCEPT
There is no right or wrong way to set up your OpenHab system. There are, however, some helpful key points which you should be aware of.
THINGS are real physical objects.
ITEMS are what you’ll generally be working with
BINDINGS are generally how you get things set up in the first place.
There are a few more key points to consider:
-
GROUPS - these are how you set logging parameters for InfluxDB, so you’ll need to think about how you’re going to GROUP your ITEMS together. For instance, for my weather station, I used “gAtmospherics” as a group, and then I added all of my weather ITEMS to that group. My weather station has a battery status, which doesn’t necessarily fit into the same group though. I make a ‘gBatteryHealth’ group to monitor all my smart things batteries.
GROUPS are key when you start making dashboards and graphs. You’ll want to be able to quickly sort out ITEMS and only show certain kinds all together and the easy way to do that, is with GROUPS. -
EQUIPMENT - this is a kind of a GROUP. The concept is that you may have something like a Smart Washer with voltage, cycle, temperature and a number of other ITEMS which may not all seem to go together, but you can GROUP them together with EQUIPMENT.
-
Widgets - These look extremely tough. Don’t sweat it. Just borrow somebody else’s work by copy/pasting their code into your own Widget creator. The key to a properly developed wiidget, is that there is the ‘Set Props’ button on the bottom left. This is where you connect the widget gui elements with your ITEMS. This makes it pretty easy to use someone else’s widget. So long as the data format of your ITEM is the same as theirs, it should “just work”.
-
Grafana - This is hell. It’s great once you understand it, but if you’re not a developer, this is just… it’s hard. There’s a tutorial from 2016 here which is helpful, but it has a few items in it which are obsolete for OH4 and you should know about them:
a. Don’t update your influxdb persistence file. You don’t need to. Just use the GUI from the InfluxDB persistence addon. It’s enough.
b. Make sure you use the right link “e.g. http://influx-ip-address:8086” and not “influx-ip-address:8086”. This will stifle the work.
c. If you’re not a developer, I recommend staying in the home field and customizing Pages for a while. If you want long-term data, you’ll need to set up InfluxDB with Grafana, and there is a good tutorial here: InfluxDB+Grafana persistence and graphing
Make sure you use the forums. There are so many answers in here. This isn’t the ‘easy button’, it’s the advanced route to home automation and a lot of people are really helpful and informative here.
Hope this helps.
