Items & Links
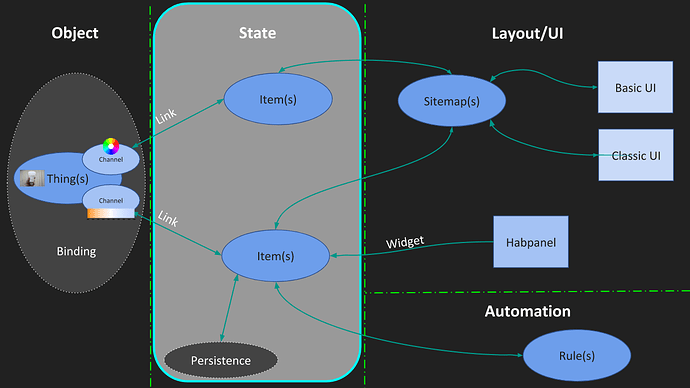
Now, I’ll show you the next and probably the most important building block of the openHAB configuration – the Item. Items are a virtual representation of state in the openHAB system, for example the color of the Hue lightbulb or whether the bulb is turned on or off. Items are usually linked to specific channels on the Thing, but there can also be standalone items that only store a value or setting -
for example a switch that you can use to tell openHAB whether you’re home or away, or a default color you want your LED strips to show when first turned on - these standalone Items are often used in automation rules, which is a topic we’ll be tackling soon. For now, just remember than an Item stores a state.
So, what do I mean by storing “state”? If you have a programming background, Items are basically variables in your program that store a value used by the rest of your program. In the same way, Items store a value, which can be set by the Thing channel they’re linked to, the User Interface, a rule or a persistence strategy (more about those later!).
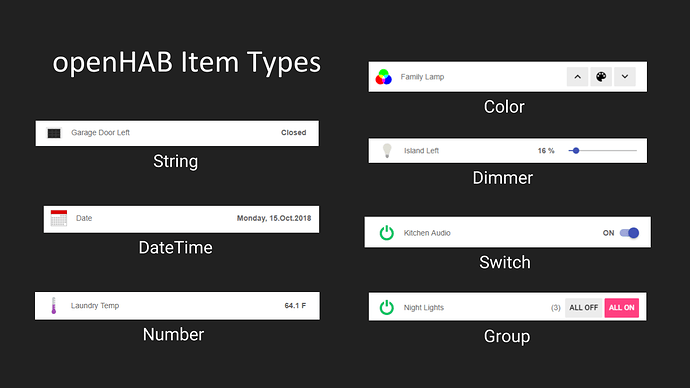
Just like there are different types of variables in a computer program, there are different types of Items for all the different types of data they need to store.
-
A String item is used to store just a basic character string.
-
A DateTime item is a slightly different example of a string item that specifically stores time values.
-
A Number item stores numerical data, for example a sensor temperature.
-
Color items store color data (for example, the Hue bulb color).
-
Dimmer items store percentage values, for example bulb brightness or audio volume,
-
and Switch items store the ON or OFF position for a switch.
There are a few other types of items that you can use, these are just some examples. For a full list and description of each, check out the openHAB documentation site
One additional, special type of item I want to show you is the Group item….
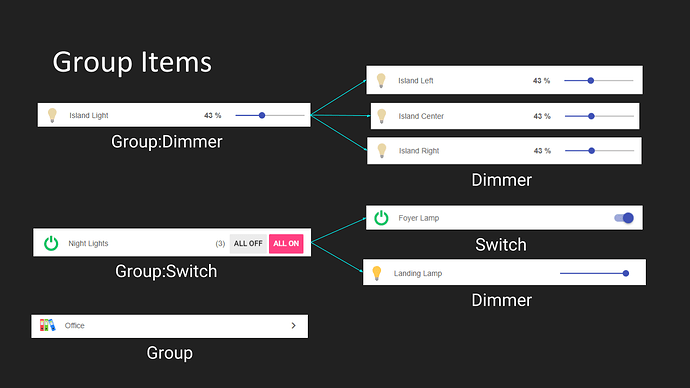
Group items allow you to organize several individual items into a group. This can be done to either control multiple Item states (and their associated Thing channels) with one Switch or Dimmer, for example….Groups can also be used to logically organize multiple related items. For example, all Items that correspond to devices in a room of your house.
Look at these Kitchen Island lights I have in my setup. Each light bulb is a separate Thing in my openHAB configuration, and each Thing is linked to a different Dimmer Item (Left,Center and Right) - I can control them individually with the sliders for each lightbulb, but I can also control them with a single slider, this Group Dimmer. When I change the Group Dimmer Item state, all three dimmer items witthin the group change to the same position.
This gives me the flexibility to set up different scenes using individual lights, or control the group as a single light.
The second example you see here is a Switch Group. Notice that the Group Switch can control a group of switches, but also a Dimmer. In this case, if I turn the switch OFF, the Dimmer item will be set to 0% brightness, but if I set it to ON, it will return to the previous setting (not necessarily 100%).
The final example is the organization group. This is a standalone item of type Group which I have named “Office”. I will use this group to organize all the devices I have in my Office.
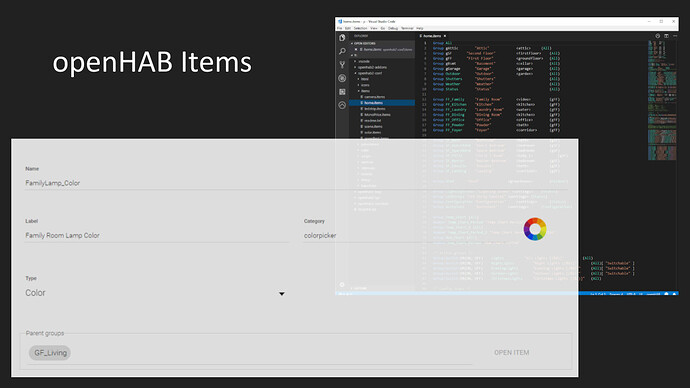
One great thing about openHAB is that there’s always more than one way of doing things….but that also makes openHAB confusing and intimidating to most new users…I’ll show you a couple of the ways you can add and configure items in your openHAB system, including a very easy way using PaperUI, but I’ll also show you my preferred method to use - config files. I prefer configuration files, because I can split up my items by function, quickly modify multiple items and their parameters, and easily backup/restore and move my openHAB configuration between my development and production Raspberry Pis.
So, if you followed this series from the start, I had you install openHAB with the Demo configuration - if you did that, you already have some items defined in your openHAB system. Also, in the Demo configuration, openHAB is set up to automatically create items for every channel of every Thing you add to the system. This is nice, but the item names end up being pretty non-descriptive and I would rather show you how to do this yourself. So, the first thing we’ll need to do is go into the PaperUI, the Configuration section and the System page. On it, you’ll find this Item Linking option, Simple Mode enabled. When enabled, openHAB will automatically create an Item and link it to a channel of every new Thing you add. We want to do this ourselves, so let’s disable this option for now. As soon as I do that, you will notice that a new page popped up in the Configuration section, for Items.
When I click on it, you’ll see that I already have a number of items, some automatically created from the Thing channels we added in the last video, others created by the Demo configuration files. Take a look at all these different Items and their types - you see some DateTime items, Number, String, as well as Group items.
So, now that we are done creating/editing Items, I want to bring up the most important point….All we have right now, is a standalone Item (remember when I mentioned those in the beginning of the video?) Even though my item is named Family Room Lamp, it’s not currently linked to anything, so even if I would change the color of the Item, I’m only changing that Item, and not the Hue Bulb’s Color Channel. So, the next thing we need to do is actually LINK this item to the correct Thing channel.
META
-At this point in the video, I switch to VSCode and show editing config files for adding items and links (not easy to show in a post)
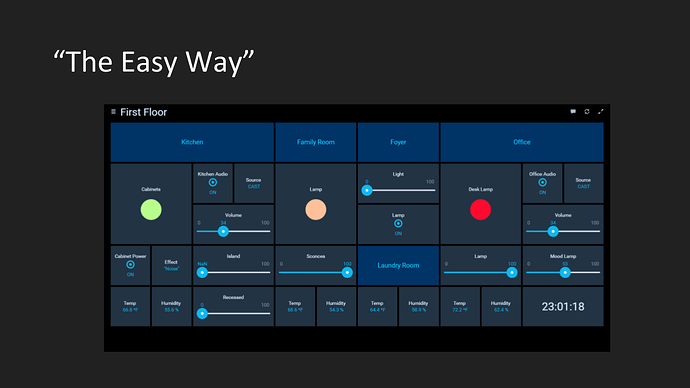
Ok! So, now that you’ve learned about Things and Items and how to link them, you could take a small detour here and use Habpanel to create a beautiful, fully functional and touchpad friendly user interface. Just watch my video that I’ve linked to here, to see just how easy that interface is to build. You will be using the Items you’ve configured and attaching those items to Widgets on the Habpanel UI. This really is the easiest and quickest way from a bare openHAB installation to a fully usable home control system. But, we will keep going and in the next post we’ll start looking at Sitemaps and the user interfaces that require them. Then, we’ll take it another step further and learn about writing your own rules, which will turn your openHAB control system into an actual home AUTOMATION system.
Previous Topic
Next Topic
Full VIdeo
