This has now been merged into the main docs (should be available sometime in the next day or so after the next build). Thanks for all comments and edits! I’m closing this thread now.
This Wiki topic’s goal is to serve as a working document, in order to provide an up-to-date tutorial for OH3 aimed at new users and novices. Everyone is welcome and encouraged to edit it, when we’re satisfied it will make its way to the official docs. You may reply for the specific purpose of improving the article are allowed, but please, this is NOT a support thread: if you’re stuck while reading this and are simply seeking support please open another thread. Thanks!
To this point we have connected Things to devices, modeled our Things by creating Items, and built the start of a UI to control the devices. But all of that just enables control of devices. How does one cause something to happen in response to events in openHAB, i.e. automation? For example, turn on the porch light when someone returns home or turn on an exhaust fan when the humidity rises above a threshold? This is what rules are for.
Event driven
One important concept about rules that must always be kept in mind is that they are event driven. An event occurs and any rule may run in response. A single rule can run based on more than one event but it will only be triggered on the event, not on the states of Item. You cannot trigger a rule based on two events (e.g. Item Foo changed to OFF and Item Bar changed to ON) because no two events actually occur at exactly the same time. Also, you cannot define a state condition in a trigger because a state condition (e.g. Foo > 25) isn’t an event, it’s a state.
Two Approaches
There are two primary approaches for writing rules and one can combine the two if required.
Text based
Text based rules are written with text editors and saved in openHAB’s conf folder. Regardless of the language chosen (more below) the code files must:
- define rules and their triggers
- define the code to run when the triggers happen.
Text based rule files are loaded when openHAB starts up and when the files are changed.
Pros:
- More natural approach for developers who already know how to code.
- Easier to share data between separate rules.
- The only viable way to write libraries of code called from multiple rules.
Cons:
- Slightly slower to be parsed and loaded.
- Lacks a “but only if” clause (see below) so any conditions have to be included as part of the body of the rule.
- Requires significantly more code to write.
- All rules in the same text file will be deleted and recreated even if just one of them are changed in that file.
UI Created
UI created rules are created through MainUI. Much of the pro forma required for the creation of the rule and its triggers are handled for you. UI Created rules also includes an additional “but only if” clause. This is a place where the rule can be prevented from running unless certain state conditions are met (e.g. it’s between 12:00 and 17:00 time).
Pros:
- Simple rules do not even require code.
- Blockly is an option for writing the code in a graphical style.
- Can be accessed and modified from any browser that can access your openHAB server.
Cons:
- Sharing variables between rules or even preserving rules from one run to the next is not as simple.
- Clicking around the browser is not as efficient for some users as writing text, though the Code tab helps to address some of that.
This tutorial will only present the UI created rules approach.
Languages
As of this writing, there are five supported programming languages to choose from for writing rules. The following table presents their pros and cons.
| Language | Pros | Cons |
|---|---|---|
| Blockly | Graphical, renders to JavaScript | Slow to develop, hard to change, large rules become unruly |
| Rules DSL | Comes out-of-the-box, has the most examples on the forum | Does not support all features of OH or normal programming languages such as classes, functions, access to Item metadata, etc. |
| Jython | Second most number of examples, most mature third party helper libraries | Stuck on Python 2.7 for now, requires a separate add-on |
| JavaScript | Comes out-of-box | Stuck on Nashorn which is ECMAScript 5.1, awkward method for importing libraries that make most generic JavaScript third party libraries unusable |
| Groovy | Has the least number of examples (fewest number of users?), requires a separate add-on |
As you can see, there are significant limitations for all of the language choices. If you are totally new to programming, Blockly would be a good choice. This tutorial will present JavaScript as the example language for advanced programming, but the concepts presented will work with any of the languages. You can use more than one language at a time if you choose. In UI rules you can even use more than one language in the same rule, just not in the same Script Action or Script Condition (more on that later).
Anatomy of a Rule
Each rule has three main sections:
| Section | Also Called | Purpose |
|---|---|---|
| When | Triggers | Defines the events that will cause the rule to run. |
| But only if | Conditions | Defines the conditions that must be true for the rule to run when triggered by an event. |
| Then | Actions | Defines what to do when the rule is triggered and conditions are met. |
The flow therefore is
- event occurs to trigger a rule
- conditions are checked to see if the rule can run
- if the conditions pass, the actions are executed.
When
Rule triggers are always events. When the defined event occurs, the execution is passed off to the But only if to see if the rule is allowed to run. The types of event that can trigger a rule include:
- Item events: received command, changed state, received update
- Thing events: a Thing status changes or updates, events on a special type of Channel called an “event trigger”
- Member of Group events: when a member of a Group receives one of the Item events
- Time events: cron defined times, fixed times of day
- System events: e.g. when openHAB first starts
But only if
The conditions are very similar to the rule triggers except they operate on state. The sorts of states that can be used include:
- Item states comparisons including ==, !=, <, >, <=, and >=
- A range of time over the course of the day (e.g. between 12:00 and 17:00)
- A certain type of day as defined by Ephemeris
- A script evaluates to true
The Script Condition is particularly powerful as you can create quite complicated comparisons and even add error correction to the script if necessary (e.g. if a String Item only has a few valid states set the Item back to it’s previous state if it changes to an invalid state). One particularly useful comparison is to test whether the Item is changed from NULL or UNDEF and not run the rule if it did.
event.oldState.class == UnDefType.class
Then
This is the part of the rule where you define the stuff that should occur when the trigger occurred and the conditions are met. The sorts of things you can do as actions include:
- enable or disable other rules
- run another rule
- send a command to an Item
- execute a given script
The first two are interesting options. For example, one might have a bunch of smart plugs that normally run humidifiers but during Christmas time they run the Christmas lights. One can use the enable/disable Action to disable the humidifier rule and enable the Christmas lights rule when a Switch (or cron expression) indicates that it’s Christmas lights time.
The most commonly used action though will be execute a given script.
Your First Rule
Prerequisites:
- A Switch Item to control a Light, in this case we will use an Item named
MasterBedroom_Light_Power - A light level sensor that the light should be controlled by, in this case we will use an Item named
MasterBedroomSensors_LightLevel
Scenario: When the light level measured by the sensor goes above a threshold value or it’s 08:00 turn on the light, but only on weekdays.
Navigate to Settings → Rules and click the + icon to create a new Rule.
Create a reasonable Unique ID, Name, and Description.

We have two events where we want to run this rule. First is when the sensor goes above a certain threshold. That’s a state comparison though so we want to trigger the rule when ever the sensor changes to any state. We will check the level in the but only if section.
Click “Add Trigger” and choose “an Item state changes” as the trigger type. Select the MasterBedroomSensors_LightLevel as the Item and return to the Create Rule main page but clicking Done.

Next we need a trigger at 08:00. Again click to add a trigger and this time choose “it’s a fixed time of day.” Select 08:00 for the time.

The rule should look like this.

Now let’s set the conditions. There are two conditions. The first is that the light sensor is below a threshold value. Click to “Add Condition” and choose “an Item has a given state”. Select the light sensor Item, < as the operator, and the threshold value.

The second condition is that it’s a weekday. For this we will use the day of week condition. Create another condition and choose “it is a certain day of the week” and choose the weekdays.

Now we need the action, turning on the light. Click “Add Action” and choose “send a command” and select the light’s Item and set the command to ON.

The rule now looks like this.

There is one more detail to add to the rule. This is a rule that triggers on a schedule. These rules can be added to the schedule view by adding a “Schedule” tag at the bottom of the page.

The rule is now complete, click Save or hit ctrl-s. Click on “Code” and you can see what the rule looks like a YAML.
triggers:
  - id: "1"
    configuration:
      itemName: MasterBedroomSensors_LightLevel
    type: core.ItemStateChangeTrigger
  - id: "2"
    configuration:
      time: 08:00
    type: timer.TimeOfDayTrigger
conditions:
  - inputs: {}
    id: "3"
    configuration:
      itemName: MasterBedroomSensors_LightLevel
      state: "50"
      operator: <
    type: core.ItemStateCondition
  - inputs: {}
    id: "4"
    configuration:
      days:
        - MON
        - TUE
        - WED
        - THU
        - FRI
    type: timer.DayOfWeekCondition
actions:
  - inputs: {}
    id: "5"
    configuration:
      itemName: MasterBedroomLights_Power
      command: ON
    type: core.ItemCommandAction
Note that you can edit the rule through the code tab if that works better for you and the yaml is much better for sharing.
Because we’ve tagged this with “Schedule”, it will also appear on Settings → Schedule.
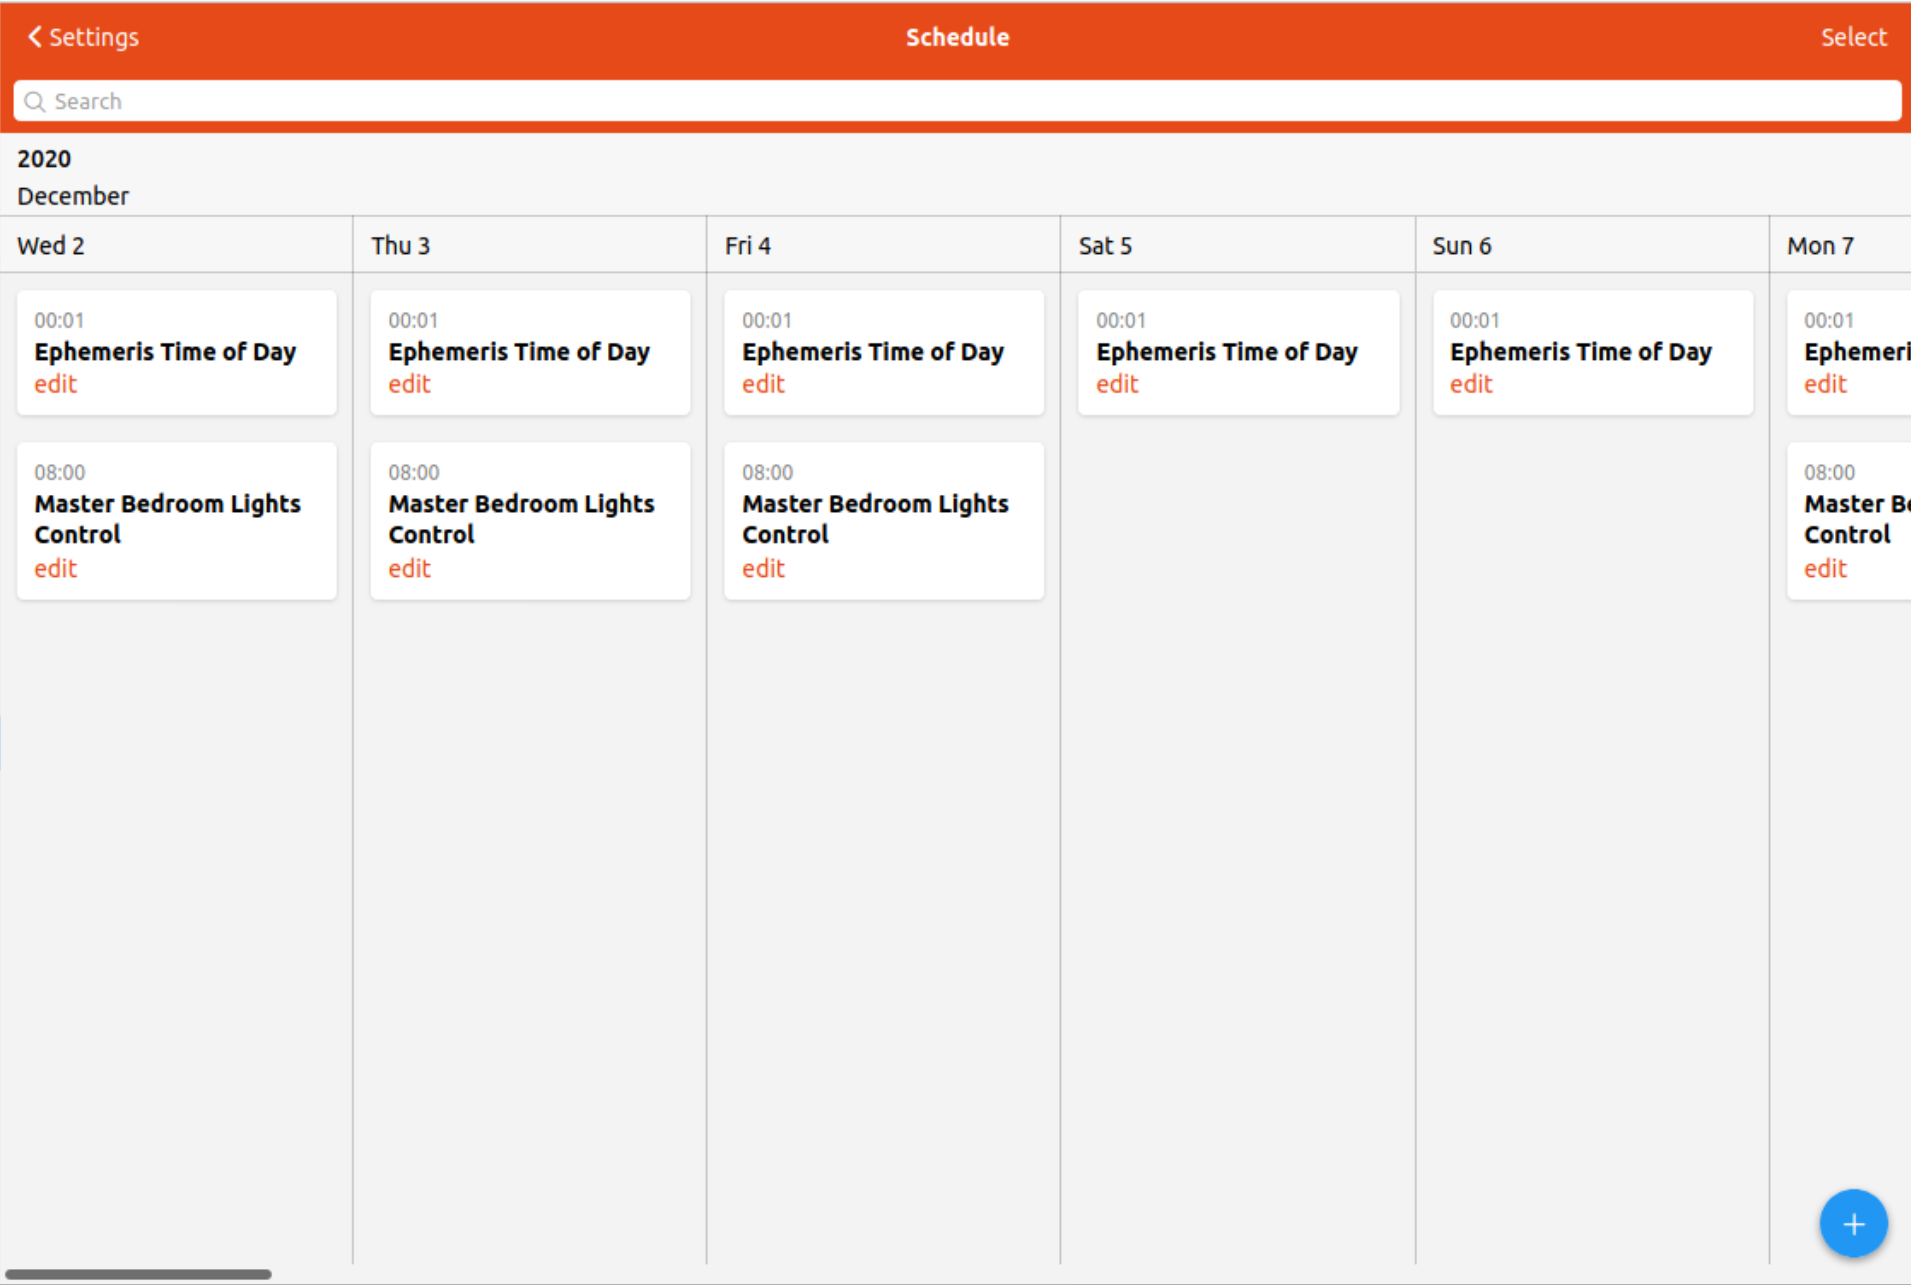
You can see the new rule will run every weekday at 08:00.
Previous → Pages
Next → Putting it all together
Previous ← Pages - Custom Widgets
