Objective
Integrate IFTTT Platform services with openHAB by hosting a private instance of openHAB Cloud Connector on Azure.
Prerequisites
- Familiarity with Linux command line interface
- Azure subscription
- IFTTT account (and optional Maker service setup for webhook example)
- Existing openHAB instance and UUID and secrets
High-Level Steps
- Create and Configure VM
- Install openHAB Cloud Connector
- Install openHAB Cloud Connector Add-on
- Install LetsEncrypt SSL certificates
- Install and configure NGINX
- IFTTT Platform service integration
- Create IFTTT Applet
- Final VM configurations
Create and Configure VM
- Login to your Azure Portal and create a new Ubuntu 18.04 VM according to your needs
- Configure NSG to allow inbound TCP/80 and TCP/443 to your VM private IP address
- Create a FQDN DNS Name and note this for later
- SSH into your VM
- Update the OS and install additional packages
$ sudo apt update;sudo apt upgrade -y
$ sudo apt install build-essential redis-server mongodb nginx python git certbot python-certbot-nginx -y
- With this version of Ubuntu we need to install a specific version of Node:
$ wget https://nodejs.org/download/release/v7.10.1/node-v7.10.1-linux-x64.tar.gz -O /var/tmp/node-v7.10.1-linux-x64.tar.gz
$ sudo mkdir /usr/local/lib/nodejs
$ sudo tar -xvf /var/tmp/node-v7.10.1-linux-x64.tar.gz -C /usr/local/lib/nodejs
$ sudo ln -s /usr/local/lib/nodejs/node-v7.10.1-linux-x64/bin/node /usr/bin/node
$ sudo ln -s /usr/local/lib/nodejs/node-v7.10.1-linux-x64/bin/npm /usr/bin/npm
- Verify that version 7.10.1 is running
$ node --version
- Create user openhabcloud and group openhabcloud
$ sudo useradd -M -r -s /bin/false -c "openHAB Cloud Connector" openhabcloud
Install openHAB Cloud Connector
- Download the latest version of cloud connector:
$ sudo git clone https://github.com/openhab/openhab-cloud.git /opt/openhabcloud
$ cd /opt/openhabcloud
$ sudo npm install
- Change ownership of the directory
$ sudo chown -R openhabcloud:openhabcloud /opt/openhabcloud
- Create the initial configuration file
$ cd /opt/openhabcloud/
$ sudo cp config-development.json config.json
- Edit /opt/openhabcloud/config.json, and replace the placeholder with your FQDN created above
- MongoDB username and password fields should be deleted, if there is no authentication configured
- Check if redis is running with ping command / expect PONG reply if everything is fine
$ redis-cli ping
- Start the service to test if it’s working
$ sudo node app.js
- Note: the application is now running in the foreground. Press CTRL-C to end.
- Check the log output file at /opt/openhabcloud/logs/openhab-cloud-CCYY-MM-DD-process-nnnn.log for errors
- Optional: From your host computer (not the VM) configure SSH tunnel to test login of the web UI. Remember this service is running on TCP/3000 and that is not exposed to the public Internet. Otherwise, run netstat -an | grep LISTEN | grep “:3000” to see if the service is listening for incoming connections. Another alternative might be to use ngrok.
Install openHAB Cloud Connector Add-on
- From your openHAB Paper UI navigate to Add-ons > Misc
- Find misc-openhabcloud - 2.4.0 in the list of available add-ons and install
- Edit file services/openhabcloud.cfg adding your FQDN and expose at least one item to openHAB Cloud Connector. This item will be available once IFTTT integration is completed.
baseURL=https://[FQDN]
mode=remote
expose=demoSwitch
Install LetsEncrypt SSL Certificates
-
Optional: It’s free and easy so why not? This requires port TCP/80 open inbound which is why the Azure NSG contains this entry. Can be removed from NSG once certs are installed with this process.
-
Setup front-end NGINX web server by copying site configuration file that came with openhab cloud connector
-
Note: LetsEncrypt certificates expire after 2 months.
$ sudo cp /opt/openhabcloud/etc/nginx_openhabcloud.conf /etc/nginx/sites-available/default
$ sudo sed -i '/listen \*:80/d' /etc/nginx/sites-enabled/default
$ sudo service nginx restart
$ sudo certbot --nginx -d [FQDN]
Install and Configure NGINX
- Edit /etc/nginx/sites-enabled/default to reflect the location of the SSL certificates and update the server_name directive as shown below.
server {
listen *:443;
ssl on;
ssl_certificate /etc/letsencrypt/live/[FQDN]/fullchain.pem;
ssl_certificate_key /etc/letsencrypt/live/[FQDN]/privkey.pem;
server_name [FQDN];
if ( $scheme = "http" ) {
rewrite ^/(.*)$ https://$host/$1 permanent;
}

charset utf-8;
access_log /var/log/nginx/openhab-cloud.org-access.log;
error_log /var/log/nginx/openhab-cloud.org-error.log;
client_max_body_size 300m;
location /css {
alias /opt/openhabcloud/public/css;
}

location /js {
alias /opt/openhabcloud/public/js;
}

location /img {
alias /opt/openhabcloud/public/img;
}

location /bootstrap {
alias /opt/openhabcloud/public/bootstrap;`
}

location /font-icons {
alias /opt/openhabcloud/public/font-icons;
}

location /fonts {
alias /opt/openhabcloud/public/fonts;
}

location /js-plugin {
alias /opt/openhabcloud/public/js-plugin;
}

location /downloads {
alias /opt/openhabcloud/public/downloads;
}

location / {
proxy_pass http://localhost:3000;
proxy_redirect off;
proxy_http_version 1.1;
proxy_set_header Host $host;
proxy_set_header Upgrade $http_upgrade;
proxy_set_header Connection "upgrade";
proxy_set_header X-Real-IP $remote_addr ;
proxy_set_header X-Forwarded-For $proxy_add_x_forwarded_for ;
proxy_set_header X-Forwarded-Proto https;
}

#error_page 404 /404.html;
# redirect server error pages to the static page /50x.html
#
error_page 500 502 503 504 /50x.html;
location = /50x.html {
root html;
}
}
- Start the NGINX web service
$ sudo service nginx restart
$ sudo node app.js
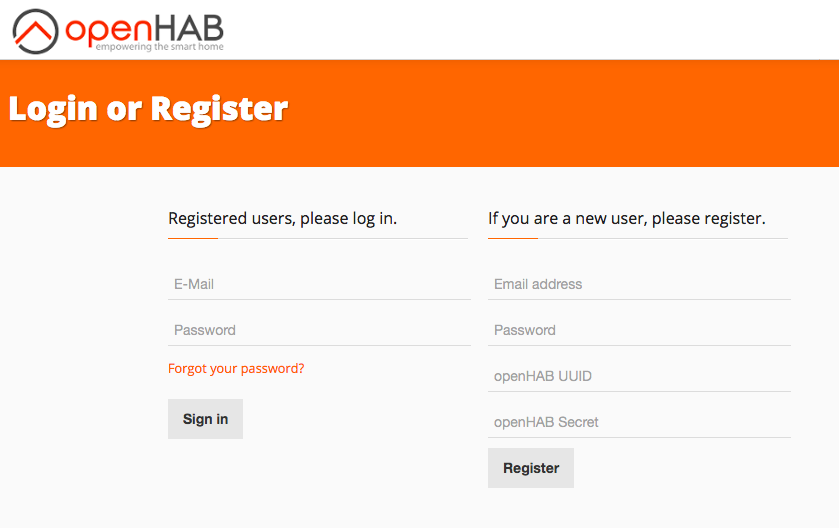
- Visit your openHAB Cloud Connector at [https://FQDN]
- Register your openHAB instance by creating an account and supplying the UUID and Secret
IFTTT Service Integration
This section is based on the excellent guide: How To: Integrate Custom openHAB Cloud with IFTTT
- Generate Client ID and the second Client Secrets by running the following command twice. Save the output for step 7.
$ python3 -c "import secrets; print(secrets.token_hex(32))"
- Create a demo account your instance of openHAB Cloud Connector. UUID and secret values won’t be used so anything will work. IFTTT Platform requires a demo account in step 10.
- Visit https://platform.ifttt.com/ and create a new Organization and Service.
- Fill out any required items under Service > General
- Navigate to “API” and fill in the IFTTT API URL with your FQDN
- Note the Service Key which will be used later
- Navigate to “Authentication” and select “My API has users with non-expiring OAuth2 access tokens” and enter Client ID and Client Secret here
- Set the “Authorization URL” to “https://[FQDN]/oauth2/authorize”
- Set the “Token URL” to “https://[FQDN]]/oauth2/token”
- Enter the demo account credentials that you created in Step 1 and Save all settings
- SSH into your openHAB Cloud Connector VM and configure the following oauth settings in mongodb
$ mongo
>>> use openhab
>>> db.oauth2clients.insert({ clientId: "[Client ID]", clientSecret: "[Client Secret]"})
>>> db.oauth2scopes.insert( { name : "ifttt", description: "Access to openHAB Cloud specific API for IFTTT", } )
>>> exit
- Add your IFTTT Service Key to config.json
    "ifttt" : {
    "iftttChannelKey" : "[IFTTT Service Key]",
    "iftttTestToken" : ""
    },
- Restart openHAB cloud connector service
- Login to your openHAB cloud instance with your demo account
- From the API tab navigate to “Authentication Test” and click “Begin Test”
- After a short wait, you will be redirected to your openHAB Cloud Connector’s OAuth2 authorization prompt. Click Allow.

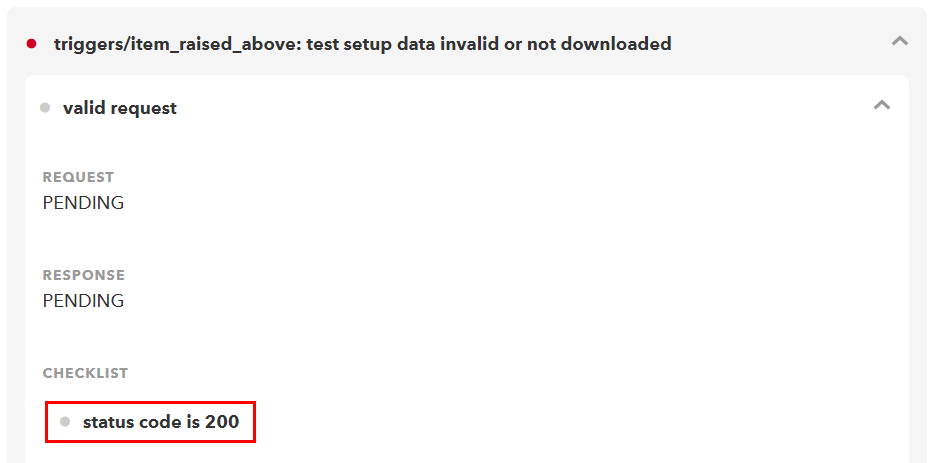
- The results should look like this:

- Expand “Request access token” section and find the BODY entry under Response. Copy the access_token value and enter it into the iftttTestToken value in your config.json file.

- Optional: Execute the Endpoint tests. Expect these to fail but responses should contain HTTP status code “200” to indicate successful response from your endpoint.
- To send a command to openHAB from IFTTT applets you will need to configure an Action. Example form:

- Click Save and create two Action fields
- Field 1: This is a dynamically retrieved list of exposed items from your openHAB instance.
- Label: Which Item?
- Key name: item
- Required: This action field is required…
- Action field type: Dropdown list
- Retrieve list items from my service: https://[FQDN]//ifttt/v1/actions/command/fields/item/options
- Field 2: This is the command or value to set the OH item to. In an applet this might be state of ON or OFF.
- Label: Command to send
- Key name: command
- Required: This action field is required…
- Action field type: Text input
- Messages: Short text
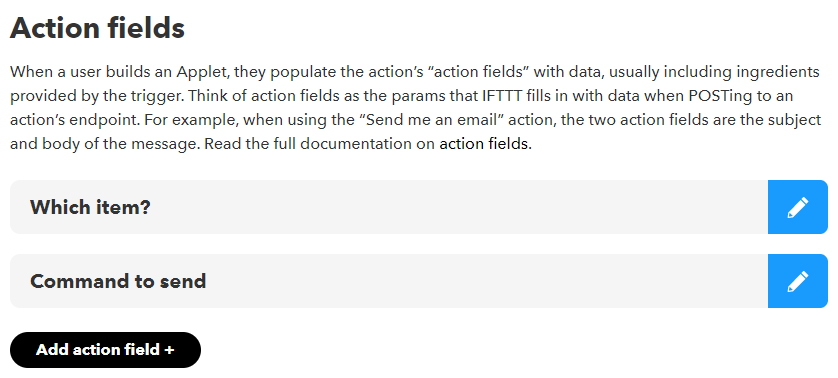
- Once completed the Action “Send a command” should have these two action fields:
- Important: Disable registration feature so that your instance of openHAB Cloud remains private. Edit the config.json file and append/edit the registration_enabled value to false
- Restart the service for the change to take affect
    ...
    "legal": {
    "terms" : "",
    "policy": ""
    },
    "registration_enabled": false
    }
Create Sample IFTTT Applet
- Ensure that your item(s) appear on your openHAB Cloud instance. If none appear use Karaf remote console to set a value to an exposed item. This will force the item to appear in the openHAB Cloud item list.
openhab> smarthome:send demoSwitch ON

- Visit Get Started - IFTTT
- Choose trigger: Webhooks (Note: Maker service setup required before using Webhooks)
- In the “Event Name” field enter demoSwitchON this will be passed as part of the URL in the Webhook call
- Next click +That and in the search box type in the name of your IFTTT Platform service
- If this is the first time using your service you will be redirected to your OAUTH2 sign in page. Important: Login with your openHAB Cloud Connector account (not the demo account) and click Allow. This has authorized IFTTT to read your OH exposed items and send them commands.
- Choose action: Send a command
- Which item?: [Select your exposed item]
- Command to send: ON
- Create Action, Review and finish!
- Repeat steps 2-10 again to create an OFF action.
- Issue a request to the webhook URL via browser or command line
$ curl -X POST https://maker.ifttt.com/trigger/demoSwitchON/with/key/[redacted]
Congratulations! You’ve fired the demoSwitchON event
$ curl -X POST https://maker.ifttt.com/trigger/demoSwitchOFF/with/key/[redacted]
Congratulations! You’ve fired the demoSwitchOFF event
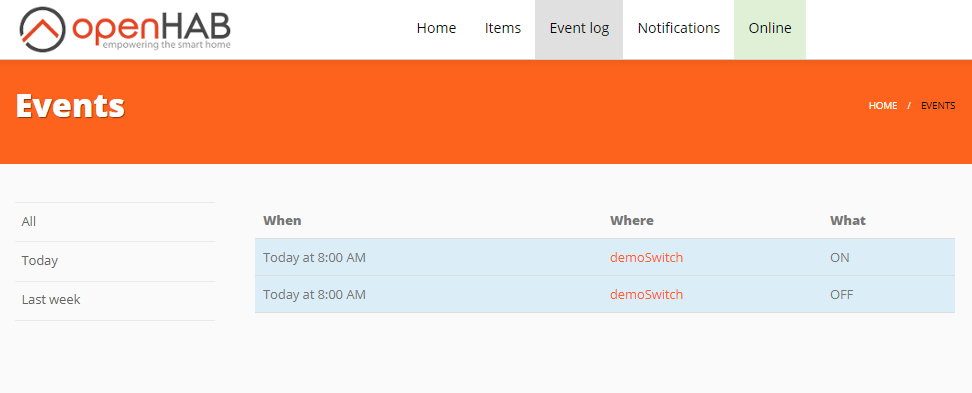
- Visit your openHAB Cloud Connector > Event log page and verify that the events were received
Final VM configurations
- Configure the service to start on boot by copying example systemd service file to /etc/systemd/service
$ sudo cp /opt/openhabcloud/etc/openhabcloud.service /etc/systemd/system
$ sudo vim /etc/systemd/system/openhabcloud.service
- Edit the file so it looks like the one below.
[Unit]
Description=node.js openhab cloud server
After=nginx.service redis-server.service mongodb.service

[Service]
User=openhabcloud
Group=openhabcloud
Environment=NODE_ENV=production
Restart=always
RestartSec=10
StandardOutput=syslog
StandardError=syslog
SyslogIdentifier=openhabcloud
WorkingDirectory=/opt/openhabcloud
ExecStart=/usr/local/lib/nodejs/node-v7.10.1-linux-x64/bin/node /opt/openhabcloud/app.js

[Install]
WantedBy=multi-user.target
- Enable the service to start on boot
$ sudo systemctl enable openhabcloud.service
$ sudo systemctl start openhabcloud.service
$ systemctl status openhabcloud.service