Tutorial: Cheap, Tuya-based, Smart Plugs. HowTo reflash them and use them with OpenHAB

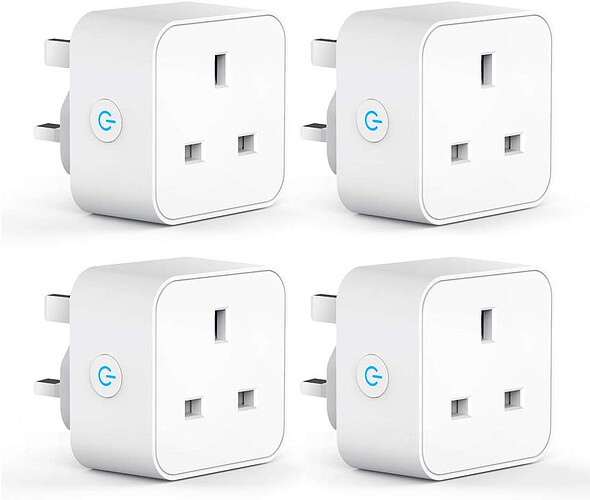
Cheap Smart Plugs (With power monitoring!)

The Mission:
Based on this thread about cheap, wifi-based smart plugs, it was suggested I do a write-up on how to flash them and how not to brick them (like I did :slight_smile:)

Why:
Smart plugs are probably the first or second thing you’ll want to do with your new smart home. But, there are a number of issues to smooth before you can use them. Once smoothed you’ll see that it’s actuallly a doddle to get these plumbed in to your system.

Why not use the stock firmware?

  • Because it phones home to China
  • Because they use proprietary protocol and you would need a new binding
  • Because it phones home to China (did I mention that?)

Requirements:

  • Buy some of the plugs from Amazon, AliExpress etc.
  • Try to ensure they are listed on this website: Tasmota Templates (Note that a lot of the plugs seem to be the same but are rebranded. I got some unlisted ones working by trying different templates.
  • Get yourself a spare Raspberry Pi 3B+ onwards (It must have LAN and WiFi)

Steps:
(I am doing this from memory so might miss-step a bit)

1. Setup Tuya-Convert:
Assuming you have a spare RPi up, running, patched and git installed, follow the very well documented steps on his site: https://github.com/ct-Open-Source/tuya-convert

2. Flash the device
Long-Press the button on the plug. This will put it into recovery mode. It should be flashing rapidly.
As per the instructions, install it all and then run

./start_flash.sh

This will go through the various steps needed to flash. One very important step is to ensure you connect your phone / tablet / other device to the new wifi hotspot. TBH, I don’t know why but it does not work without doing this step. Don’t be lazy :slight_smile:

3. Select the firmware to push
At this point, you have the choice to install the basic Espurna or Tasmota. Personally I prefer Espurna but, while the basic option boots and works, it has no features like mqtt. I tried various options and eventually bricked it. All you need is Tasmota. Install that :slight_smile:

4. Connect it to your WiFi.
Once you reboot your plug you should see a new WiFi hotspot. Connect to this and setup the credentials for your own WiFi.
Be sure to enable MQTT. You don’t need to change any of the settings if you don’t want to.
Be sure to click on the Information button and grab the hostname. eg “tmPowCoffeeMachine-2011”

5. Get the topic root from Tasmota
Once it’s all back up and logged into your network, go back to the new plug by typing in the hostname into your browser. If this does not work you’ll need to find the IP address from your router.
Again, clicking on the Information page you can see that mqtt is connected and take not of the full topic.

6. Plumb it in
Once you have all that you can plumb it into the item in question like this:

Switch PlugsChristmasTree1 "White ChristmasTree"     					{ 
																		mqtt="
																			>[mqtt:cmnd/tmPowChristmasTree/POWER:command:*:default],
																			<[mqtt:stat/tmPowChristmasTree/POWER:state:default]
																			"
																		}

Number PlugsChristmasTree1_Power    "White ChristmasTree - Power"      					
                                                                {mqtt="<[mqtt:tele/tmPowChristmasTree/SENSOR:state:JSONPATH($.ENERGY.Power)]"}

Number PlugsChristmasTree1_Voltage  "White ChristmasTree - Voltage"     					
                                                                {mqtt="<[mqtt:tele/tmPowChristmasTree/SENSOR:state:JSONPATH($.ENERGY.Voltage)]"}

(Yes, I used the mqtt 1. method which is not (the current) best but full mqtt setup is out of scope of this :slight_smile:)

Final notes
All in all it looks quite long winded but really, after the first plug, it took me maybe two minutes per plug to flash. All of it is automated and very slick. It’s really straightforward.

Let me know if I’ve missed anything or something breaks en route. I will review the steps when I flash the next batch.

C
11 Likes

Can confirm - as long as you get the right plugs, this is easy. Power reporting is faster and more reliable than zwave - so I’ve replaced all my zwave socket devices (and, as my zwave network is now simpler, it’s improved the responsiveness of the remaining zwave devices)

Which plugs are you using?

I think the same as you: https://www.amazon.co.uk/gp/product/B07QN5XY89/ref=ppx_yo_dt_b_search_asin_title?ie=UTF8&psc=1

They are really very good indeed. Note that the similar looking (but cuter) round ones do not work.

2 Likes

These did work for me. Power button on the bottom.

mine were different - smaller and cuter, but didn’t work: https://www.amazon.co.uk/Outlet-TECKIN-Wireless-Control-Required/dp/B07MT622S1

Good to know so others don’t buy them.
Sucks for you though. Could not flash them?

I try stay away from the 10A verity because we’re rated to 13A here. Use these on a heavy load and you’re in a danger zone IMHO.
Having said that, my 13A and 16A ones probably just have a 13A or 16A sticker on :frowning:

yes, they don’t flash - have the newer firmware with the “vulnerability” patched. But the square ones in your first post are great.

A pi1 or p2 or even pi0 will work as long as it has a wifi dongle that can work in AP mode
I got this one:

You can check that by opening it up and checking the relay rating
You can then report to trading standards (in the uk: https://www.gov.uk/find-local-trading-standards-office) if needed

Just bought some of the sockets from Amazon - same link as the square ones above…
https://www.amazon.co.uk/gp/product/B07QN5XY89/ref=ppx_yo_dt_b_asin_title_o01_s01?ie=UTF8&psc=1
Teckin SP23

And they use the Realtec chip RMC-W302 so not flashable with this tecnique.
There isn’t any revision or serial number on the outsides of the sockets so we won’t know what we’ve got t’ll we open them up.
The main boards in mine are V1.1 dated 16/10/2018
What I don’t know is whether later or earlier versions have the ESP.
Interestingly the Wifi board has a sticker with SP27 writen on it so I presume these are SP27 boards in SP23 cases. SP27’s are known not to work.

1 Like

thanks for the info!

that’s extremely irritating - the vendor must have updated their stock. I ordered the exact same item and they were flashable. Was about to order some more, but I guess now have to start searching for an alternative…

This tutorial worked really well for me on an SM-S0301 power strip. The one thing that wasn’t clear to me before starting is how the Raspberry Pi would connect to the power strip, as that wasn’t specifically stated anywhere. It’s obvious now, but I’ll add some detail for the benefit of others.

  1. When you run start_flash.sh, Tuya-convert changes the RPi into a WiFi access point called vtrust-flash. You then need to connect a device to it (I used a Chromebook), but you don’t have to do anything with the connected device.
  2. Put the Tuya-based device into recovery mode by holding its button, and then press “Enter” on your RPi to proceed. Your RPi wll then go looking for nearby Tuya-based devices (in my case it was very quick). It will then backup the firmware and ask you to install Tasmota, Espurna, or the original firmware.
  3. Once you’ve installed Tasmota, the Tuya-based device will reboot and appear as a WiFi called tasmota-xxxx. Connect to with a device and then go to 192.168.4.1 in a web browser to input your WiFi SSID and password. When you save, the device will reboot and connect to your WiFi network.
  4. Once the device is on your network, you can connect to it via its hostname (tasmota-xxxx) or its IP address. You can then upgrade the Tasmota firmware and configure it from a template using these instructions. You can also get all of the information you’ll need to set it up in openHAB.

Thanks for your efforts, @CDriver! Now to figure out how MQTT works…

How much energy do Tuya-based smart plugs consume themselves?
Has anyone measured it?

A smart plug which consumes more than ~1W would defeat the purpose for me, hence my asking!

It’s a little more complicated than that. Let’s say a smart plug does draw 1W. If you use it to automate a 12W LED lamp and then have that lamp turned on less often (due to the automation), you may or may not come out ahead. Cut your lamp usage by 30% and you’re saving energy. If it’s only 10%, maybe you aren’t. In either case, we’re usually talking about miniscule savings over the course of the year. Your electrical provider may have a calculator on their website to help you understand how much every device costs you on an annual basis (in energy and money).

As you allude to, we’re “saving energy” by spending energy–we could just choose to be better about turning off the light manually, thus avoiding all of the extra electricity. If someone’s primarily concerned about that, then they should not be automating anything with always-on devices. I’d also suggest that they unplug all of the devices that are constantly drawing a tiny trickle of current: TVs, stereos, computers, USB chargers, microwaves, ovens, washing machines, etc. Maybe leave the refrigerator. :wink:

1 Like

Thanks @rpwong . And yes I agree for a use-case where automation allows you to have a device switched off / in stand-by more than it would have otherwise been, then it’s likely to be net positive.

In my case, I was thinking about smart plugs to power-off (as if it was unplugged) some devices instead of having them be in standby where they consume a small amount of power (e.g. my TV+soundbar+game console draw about 4.5W in standby).
And so as to not be annoying, I was thinking to do a schedule along the lines of:

  1. power off the device (e.g. TV) when I’m very unlikely to use it
  2. have it a standby for the time of the day/week I tend to use it (e.g. watch TV). That’s so I can switch on my TV as usual as opposed to having to “manually” switch the plug on first.

In that scenario it’s harder to end up saving money (or CO2, depending on how you look at it / what motivates you). That’s why I was asking…

For reference, I bought a gosund UP111 plug to test it (I haven’t flashed them (yet) as I wanted to do a few tests first) and:

  • they consume 0.6W when the switch is off
  • and 1.3W when the switch is on – this seems to be pretty constant, at least when nothing is plugged, or something drawing about 14W is plugged.
  • (and for some reason the plug doesn’t report any power consumption if it’s below about 3W (e.g. devices on standby))

Maybe I’ll start a thread to collect that info on other plugs from people willing to check and share.

I once thought about doing this with my TV/sound bar, but when I put an energy-monitoring smart plug on it and did the math, the consumption/cost savings were miniscule.

Using the BC Hydro appliance cost calculator, a constant 4.5W draw amounts to just under 40 kWh for a cost of $4.50. Of course, this is specific to British Columbia, Canada, where we have cheap hydroelectric power.

I’ve done something like this, but using system modes instead of time of day. Everything is on when I’m “home”, but certain things turn off whenever I’m “away” or “sleeping”. Not just devices that draw phantom power, but also devices that I might accidentally leave on.

Interesting that the Gosund plug draws more when it’s on. I wouldn’t have expected that.

Neither do my Tuya energy-monitoring plugs. I think they probably have a minimum threshold for measurable current.

FYI, you can probably use your Gosund plugs with the SmarthomeJ Tuya binding. You have to set up a Tuya developer account, but once that’s done it’s all easy. In most cases you can deny the plugs Internet access, but we’ve learned that energy monitoring doesn’t work without it.

I suspect that they’ll all be in the same ballpark, but that WiFi plugs will consume more power than Zigbee/Z-Wave plugs.

In Germany 40kWh would be about 16 Euro /$23 :joy:

The Tuya restriction on flashing has driven me to ZigBee devices as they just work out of the box 99% of the time.
I bought some ZigBee power monitoring switch that look like the ones you bought on the original thread.
Aubess Zigbee Smart Socket Intelligent 16A Plug With Power Monitor Wireless. They are about $13-18 Australian though.